
A Transport Fever 3 warehouse stores cargo between separate transport legs. You normally need one whenever freight must leave one vehicle or line and wait for another, such as a ship-to-truck, train-to-truck, or train-to-train transfer. You do not need warehouse storage when a vehicle delivers cargo directly to its final factory or town consumer without an intermediate transfer.
Place the warehouse within the relevant station's catchment radius. It does not need its own road access. Once it is in range, compatible cargo can move between the warehouse and vehicles using that station.
The important limitation is that factories and town buildings cannot take goods directly from warehouse stock. A warehouse is a transfer point, not an automatic supplier. Cargo stored there still needs a suitable downstream line that carries it to the actual consumer.
| Situation | Warehouse required | Reason |
|---|---|---|
| A train carries cargo directly from a producer to a station covering the final consumer | Usually no | The cargo is delivered without changing to another transport leg. |
| A ship unloads cargo that trucks will collect | Yes | The cargo needs storage while moving between ship and truck services. |
| Cargo changes from one train service to another | Yes | Station platforms do not provide the required transfer storage. |
| A truck delivers directly to a factory or suitable town building | No | The receiving building consumes the cargo directly. |
| Cargo should wait near a hub until another vehicle arrives | Yes | The warehouse provides the intermediate stock needed by the next vehicle. |
What a Warehouse Does
Warehouses separate cargo storage from station handling. Stations, ports, and truck facilities provide access for vehicles, while the warehouse holds freight waiting for its next movement. Building a larger station or adding handling facilities does not replace the need for storage at a transfer point.
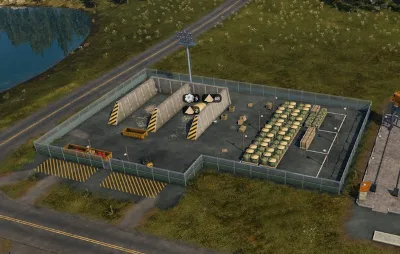
A working transfer therefore has three distinct parts:
- An incoming line brings cargo to a station or port.
- A compatible warehouse inside that station's catchment receives and stores the cargo.
- A departing line loads the cargo and carries it to another transfer point or its final consumer.
Catchment is what creates the connection. A warehouse can function from across a nearby road when it remains within the station's effective radius; a driveway or direct road attachment is not required. Always verify the catchment relationship rather than judging the connection by visual distance alone.
Build a Working Transfer Hub
Use the following sequence when adding storage to a freight route:
- Identify the exact transfer. Decide which incoming service will unload cargo and which outgoing service will collect it. If no vehicle change is needed before the final consumer, reconsider whether a warehouse is necessary.
- Choose the station or port that owns the transfer. Both the incoming and outgoing services need access to an appropriate stop. They may use different terminals, but the warehouse must be inside the catchment of the station through which cargo will move.
- Place the warehouse within catchment. Road access is optional, so prioritize a confirmed catchment connection and enough physical space for useful modules.
- Install compatible storage. A universal warehouse can accept a mixture of cargo. A specialized module must be assigned to the particular cargo type it will hold.
- Configure the incoming stop. Make sure the arriving service is permitted to unload the intended cargo at the transfer point.
- Configure the outgoing stop. Allow the departing service to load that cargo, then send it to a stop serving the actual factory or town consumer.
- Observe one complete movement. Confirm that cargo leaves the incoming vehicle, appears in warehouse stock, later enters the outgoing vehicle, and finally disappears into the intended consumer.
Do not treat cargo appearing in storage as proof that the complete route works. It confirms only the first half of the transfer. The downstream vehicle and destination must also be valid.
Choose Universal or Specialized Storage
Transport Fever 3 provides universal storage and four specialization categories: Liquid, Bulk, Flatbed, and Goods. The right choice depends on whether flexibility, transfer speed, or delivery time matters most at that hub.
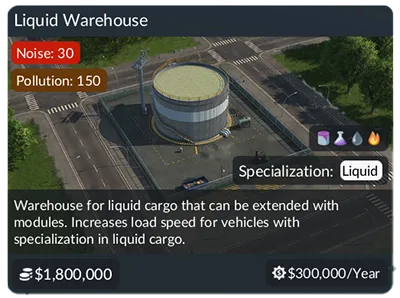
| Storage type | What it stores | Main advantages | Main limitation |
|---|---|---|---|
| Universal warehouse | A mixture of all cargo types | Flexible and cost-efficient for mixed or changing traffic | Do not rely on it for the timer-freeze benefit of specialized storage. |
| Specialized module | One selected cargo type belonging to Liquid, Bulk, Flatbed, or Goods | Freezes that cargo item's delivery timer and improves loading and unloading speed | Each module can hold only one cargo type at a time. |
Use universal storage when a modest hub handles several different cargo types and flexible capacity is more useful than specialization. It is also suitable when you are still deciding which flows will remain at the location.
Use specialized modules when a stable, high-priority flow benefits from faster handling or when preserving the cargo's remaining delivery time during storage matters. A specialized module freezes the timer while cargo is stored; check the onward transport separately.
The category name does not make a specialized module shared storage for every cargo in that category. A Liquid module assigned to crude oil cannot simultaneously store fuel. To hold both, install and assign two modules. Apply the same one-type-per-module rule to the other specialization categories.
Specialization also participates in loading-speed calculations. Matching cargo specialization across the vehicle, terminal, and warehouse can improve handling, while a mismatch can reduce it. The loading indicator shows whether the current rate is increased, normal, or decreased, so use the observed state when tuning a busy transfer.
Assign Modules and Inspect Stored Cargo
Select an existing warehouse and use Configure to enter its modular configuration view. Available warehouse modules appear in the menu at the bottom of the screen. Add the universal or specialized modules needed by the routes using the hub, leaving room for later capacity changes only when the current network justifies them.
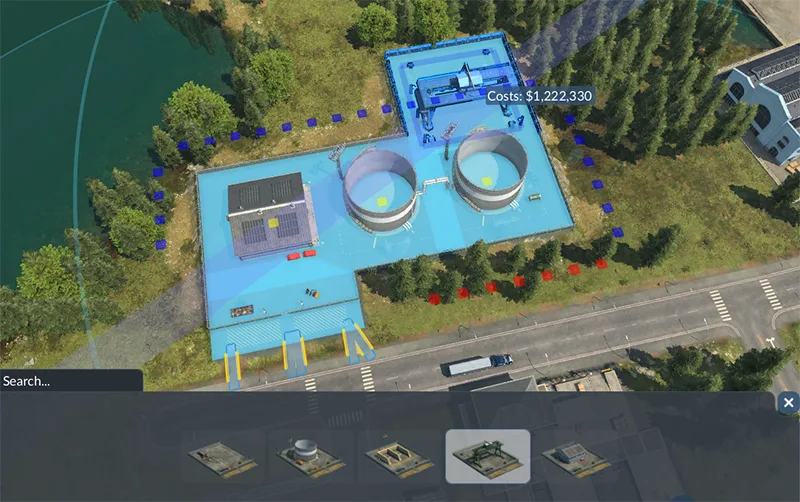
For every specialized module, select the cargo type that the module should store. This assignment is required at the item level: selecting a broad specialization category alone does not create shared storage for every item in that category.
Open the warehouse window and select Stocks to inspect the result. The interface displays one row for each module, including:
- The cargo supported by that module.
- The amount currently stored.
- The average remaining delivery time.
- A control that discards all cargo stored in that module.
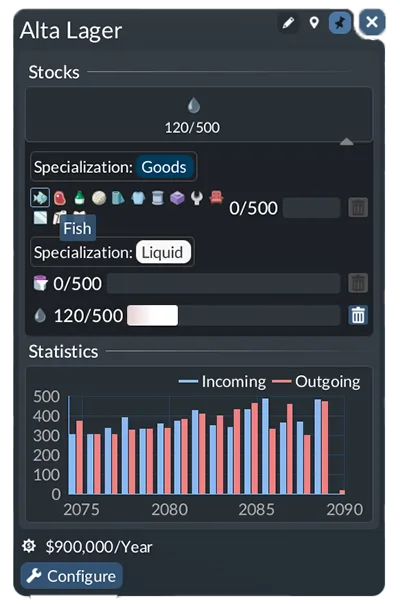
Use these rows to answer precise questions. A zero stock value may mean that no compatible freight has arrived, while increasing stock proves that the incoming side is reaching the warehouse. Stock that rises but never falls points toward the outgoing service, its cargo permissions, or its destination rather than the incoming connection.
Be careful with the discard control because it removes all cargo currently held by that module. It can clear unwanted stock, but it is not a normal transfer method and does not repair an invalid route.
Modules can also be removed while the warehouse is in configuration mode. Use the module-removal tool inside that mode when changing the layout. Using the general bulldozer outside configuration mode targets the entire warehouse instead. Finish configuration with the interface's exit action or Escape; depending on the current screen, more than one press may be needed.
Configure the Transfer Lines
Warehouse placement and line configuration must agree. A physically connected hub can still fail if the line does not permit the intended cargo to load or if no valid downstream consumer exists.
At each stop, use the line manager's stop configuration to choose which cargo types may load and the percentage of vehicle capacity they may occupy. The cargo icons shown for the stop provide a quick check of the current filter. Keep the configuration focused on the freight that the line is supposed to move, especially when passenger and cargo services share nearby facilities.
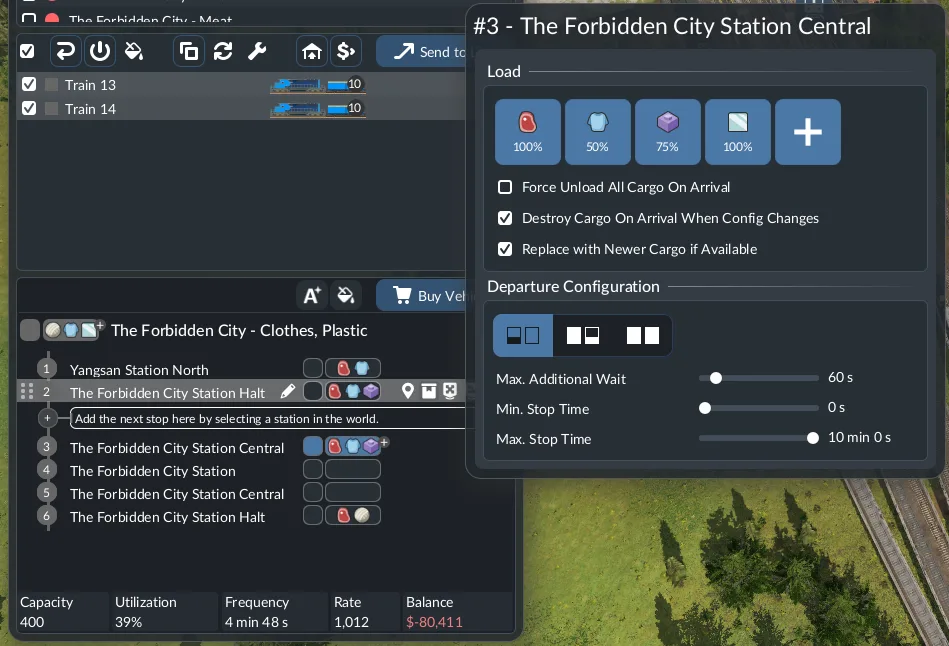
Cargo unloads automatically when the stop serves a compatible consumer or a nearby warehouse configured to store that type. On the outgoing side, the destination still must cover the actual factory or town building that consumes the cargo. Proximity between the consumer and the warehouse is not enough.
Departure behavior controls how long a vehicle waits for freight:
- Load if available lets the vehicle take compatible cargo that is ready and then continue.
- Full load (any) waits until one cargo type is fully loaded.
- Full load (all) waits until the vehicle is fully loaded.
In the unmodified game, the distinction between “any” and “all” applies to trains and ships because they can carry multiple cargo types in separate compartments or wagons. Other vehicle types wait for a full load in either full-load mode.
Choose a departure rule based on the route's purpose. A full-load setting may improve utilization, but it can also leave a vehicle waiting when production is low or when another line is taking the available stock. Start by proving that cargo can complete the route before using waiting behavior to optimize it.
Diagnose Warehouse Transfer Problems
The line reports that cargo cannot be unloaded
First determine whether the stop is a final delivery point or a transfer point. If another line is supposed to continue the journey, add compatible warehouse storage within the station's catchment. Station size and platform handling facilities do not provide substitute storage.
Then confirm that the warehouse supports the exact cargo type. A specialized module assigned to another item cannot accept the cargo, even when both items belong to the same broad category.
Cargo enters the warehouse but never leaves
This usually means the first leg works and the second leg does not. Check the outgoing line in order:
- Confirm that its stop can reach the same warehouse.
- Confirm that the cargo type is allowed to load there.
- Confirm that the vehicle can carry that cargo.
- Confirm that the destination stop covers a building that consumes it.
- Watch the next vehicle visit rather than waiting for the warehouse to feed the town automatically.
Deleting the incoming line will not make stored cargo supply nearby buildings. The stock needs a valid vehicle movement out of the warehouse.
A specialized module remains empty
Open the Stocks view and verify its selected cargo type. The specialization category and the selected item are separate decisions. If two Liquid cargo types need storage, for example, assign two different modules rather than expecting one Liquid module to alternate automatically between them.
Also verify catchment. A warehouse may look close to a station while still being outside its functional radius. Because road access is not required, catchment—not driveway placement—is the decisive connection.
Loading or unloading is unexpectedly slow
Inspect specialization across the cargo, warehouse, terminal, and vehicle. Matching specializations provide a speed benefit, while mismatches can apply a penalty. The loading HUD indicator reveals whether the current operation is increased, normal, or decreased.
For trains and trams, compare vehicle length with platform length as well. A platform shorter than the train or tram slows loading and unloading, and the game displays warnings in the relevant vehicle, station, and terminal-selection interfaces. This is a handling problem rather than a warehouse-capacity problem.
Storage fills continuously
Rising stock means cargo reaches the hub faster than it leaves, but the cause is not automatically insufficient warehouse capacity. Observe outgoing vehicle visits and determine whether they load the intended cargo. Check filters, vehicle compatibility, destination coverage, departure behavior, and service frequency before expanding storage.
Add capacity when the transfer is valid and the warehouse genuinely needs a larger buffer. Extra modules cannot repair an outgoing line that never collects the stock.