
Transport Fever 3 lets you play on a randomly generated map, use an existing map from the Mod Hub, or build your own world in the Map Editor. Choose a generated map when you want a fresh landscape configured around your preferences. Choose a custom map when a particular region or authored town and industry layout matters. Use the editor when you want control over the landscape and starting locations before playing.
Climate changes the map's appearance and terrain. Mountains, fjords, canyons and islands change which transport modes are useful. Inspect the generated industries and available cargo alongside the geography, then choose a world whose terrain and destination layout support the network you want to build.
Choose between generated and custom maps
The main choice is how much of the starting world you want to select yourself.
| Map approach | What you choose | When it is useful |
|---|---|---|
| Random generation | Climate and generation preferences | A new landscape without manually arranging the whole world |
| Existing custom map | An authored world from the Mod Hub or a saved editor map | A recognizable region or a particular starting layout |
| Map Editor | Generated or imported terrain, landscape edits, towns, industries and assets | A world you want to shape before running a transport company |
For a generated map, start with the geography you want to encounter. A mountain-focused world and an island-focused world call for different planning even before you place a service. For an authored map, start with the map's description: identify the region, climate and intended transport setting instead of choosing solely from its cover image.
A custom map does not have to be entirely handmade. The editor can generate a landscape and then allow manual placement of towns and industries. It can also import a heightmap or position information. This makes it useful for combining a generated foundation with selected locations, rather than rebuilding every part of the world from scratch.
Decide whether you want an open-ended landscape or a more deliberate arrangement of places. If the attraction is discovering an unfamiliar world, generation is a suitable starting point. If the attraction is connecting named regions or working with a creator's placement decisions, look for an existing map. If you like the terrain but want to choose the settlements yourself, the editor offers the relevant preparation tools.
Pick a climate for its terrain
The four climates offer different visual and geographical settings:
| Climate | Landscape features |
|---|---|
| Temperate | Green grasslands, forests, rivers, lakes and higher mountains |
| Subarctic | Large fjords, swamp lands and massive mountains |
| Dry | Deep canyons, flat platform hills and less vivid vegetation |
| Tropical | Tropical plants, including palm trees, and the possibility of islands |
Inspect the generated landscape, industries and available cargo before deciding whether the world suits your plan. The climate's terrain profile helps you choose the geography you want to work with.
Look for the geographical relationship you want to work with. Islands make separation by water a relevant planning consideration. A fjord or mountain landscape puts more emphasis on finding suitable connections between areas. A temperate world can combine waterways and higher ground, while a dry landscape offers canyons and platform hills. These are selection considerations, not a promise that every generated map in a climate has the same layout.
Check the world itself before committing to the save. A climate name describes the landscape family; it does not specify where every town, waterway or mountain will appear. Choose the starting geography you want and leave detailed line construction until you are playing the map.
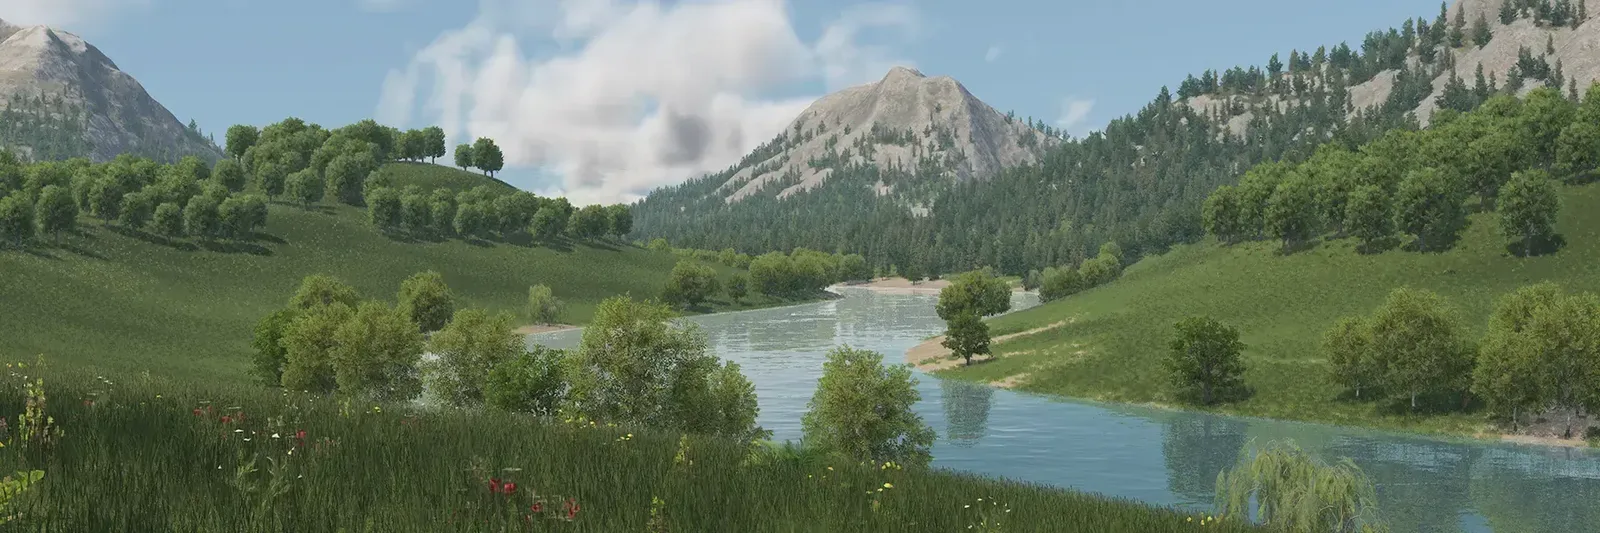
River and mountain terrain can shape the connections you plan.
Compare custom maps in the Mod Hub
Use the Map category when looking for worlds on mod.io. Read the description as well as the title, because the category includes both authored maps and terrain generators. A generator adds a way to create landscapes; an authored map supplies a particular world.
These examples illustrate different map choices. Their descriptions are useful for narrowing a search, rather than establishing a quality ranking or a compatibility guarantee.
| Map or generator | Described setting or purpose | What to consider |
|---|---|---|
| UK and Ireland Map (Megalomaniac) | Long-distance mainlines, Irish Sea ferry connections and regional cargo networks | A regional world intended for several kinds of connections |
| Romania & Moldova - Realistic Map | Real terrain, the Carpathians, Danube, Black Sea, major cities and industries | A landscape combining mountainous areas and waterways |
| Oahu, Hawaii | A map featuring the Hawaiian island of Oahu | An island setting rather than a continental region |
| Donut's One | Mountains and valleys with cities and industries to connect | A world framed around challenging terrain |
| The Great Northern Lakes | In-game generated terrain with manually placed towns and industries | A generated landscape combined with authored placement |
| Flatter Maps | A Flatter generator for every climate with a Land Height slider; water features retain their depth and stock generators remain unchanged | A generator option for creating a nearly flat world, rather than a single fixed regional map |
The UK and Ireland description identifies several intended transport relationships, but that is not a complete route plan. Use it to decide whether the region suits your interests, then inspect the loaded world's towns and industries before selecting services. Likewise, a realistic regional name tells you the geographical focus without proving that every intended connection will be convenient.
For an authored map, check whether the creator placed towns and industries or used generation for those layers. For a generator, check which climate it supports and what options it adds. Flatter Maps, for example, describes its own Land Height control while leaving the stock generators intact; selecting that generator is a different decision from opening a fixed map.
Read any stated requirements before starting. Some map descriptions identify an experimental size. Confirm that your setup supports the map's requirements instead of treating every map listing as interchangeable. A short description may also leave important details unspecified, so review the full entry rather than assuming features from its name or thumbnail.
Start a new map in the editor
Select the Map Editor card from the main menu. You can begin a new world by choosing a climate, or load a map you previously created. For a new world, adjust the setup settings, including map size and format, and use the Add Mods tab if you want additional content in the editor setup.
Choose the climate, size and format before entering. These cannot be changed inside the editor itself. If one of those foundations is wrong for your project, return to the setup rather than investing in landscape work on a world whose basic configuration you want to replace.
Use Start Map Editor to begin editing. The setup also offers a Back button to return to climate selection. Once the world is open, treat it as map preparation: shape the terrain, decide where places belong and establish the starting landscape for a later game.
To continue an existing map, select its card in the grid below the climate choices. The map card's details provide access to autosaves, settings and the active-mod list. Use this route when you want to continue a map project, rather than creating another new world with a similar appearance.
Know which work belongs in the editor
The Map Editor supports importing and exporting heightmaps, sculpting the landscape, and placing towns, industries and assets. Placement can be manual or use automated generators. It can also import town and industry positions and generate an initial street network.
Use those tools according to the part of the world you want to control. A heightmap provides a terrain foundation. Landscape sculpting changes that foundation. Town and industry placement establishes the destinations and production locations the player will encounter. Assets provide further landscape detail. You can combine these approaches instead of choosing only complete random generation or complete manual construction.
The editor's interface resembles Free Game, but several ordinary transport tools are unavailable:
- Station and depot construction for all transport types.
- Track construction.
- Vehicle and line management.
- Warehouses and Perks.
- Data layers associated with those unavailable tools.
Plan the world around the intended transport opportunities, then build and operate the services when you play the saved map. The editor can prepare an initial street network, but it is not the place to assemble a working railway with stations, vehicles and lines.
This distinction is useful when a tool seems to be missing. If you are trying to build a depot, manage a line or lay track, move from map preparation to playing the map. If you are trying to alter terrain or place towns and industries, continue in the editor. It keeps the map project focused on the starting world rather than confusing it with a developed company save.
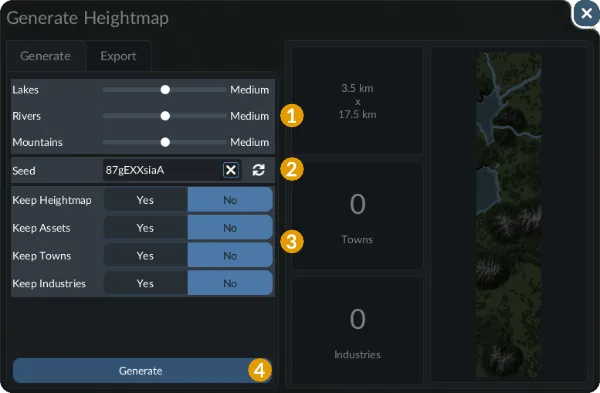
The editor prepares terrain and starting map layers; transport services are built when playing.
Save the map and begin playing
When you are ready to finish editing, open the pause menu and select Save Map. This saves the map project for later use.
To play a stored map, return to the main menu and select Load Game. Choose the map from the grid at the bottom. This is the handoff from the world you prepared to a game where you can begin building the transport network.
Keep the two entry points clear. The Map Editor is for continuing landscape and placement work. Load Game is the route for playing a stored map. If your next task is another terrain edit, reopen the editor project; if it is a passenger or freight service, load the map for play.
Share your map through the Mod Hub
To share a saved map, open Map Editor and access the details of its map card in the bottom grid. Use Share to open the sharing dialogue.
The dialogue separates the public entry's information into several fields:
| Field | Purpose and limit |
|---|---|
| Save Game Name | Entry title shown in the Mod Hub and grid; no more than 32 characters and no line breaks |
| Description | Descriptive text shown in the entry's detail view |
| Summary | Tooltip summary in the Mod Hub; no more than 100 characters and no line breaks |
| Change Log | Short account of changes since the last update; may be left empty |
| Make Public | Makes the map visible to everybody; otherwise it is not visible to other players |
Choose a title that identifies the world and use the description for its setting and arrangement. Keep the summary brief enough to fit its limit. For an update, the Change Log is the place to distinguish what changed, rather than putting update details into the map's title.
Review the mod.io terms through View if needed and accept the terms required for sharing. Use Upload to begin the upload. A first upload creates a new Mod Hub item; updating an existing upload replaces the old item. Check the visibility choice before uploading so the entry is shared with the audience you intend.
After a successful upload, the item's mod.io detail page opens in the browser. You can add images, descriptions, contributors and further information there. Use that page to present the map clearly: show the landscape, explain the regional focus and describe the town or industry arrangement you want players to understand before opening it.